


|


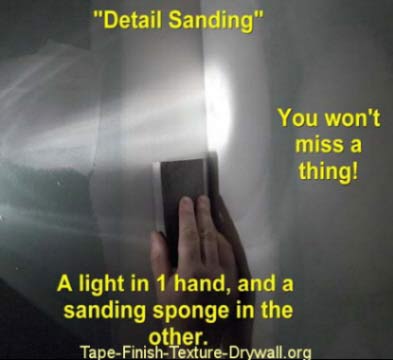
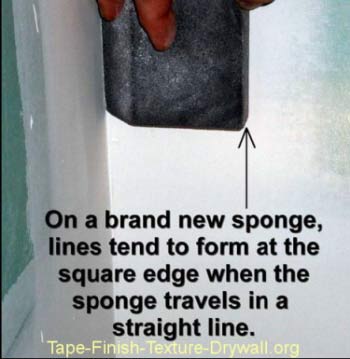
Sheetrock and Repair Tips for Eliminating 100% of the "After-Painting" Touch-Ups!STAGE 2: "DETAIL" SANDINGSheetrock and Repair Tips #1: The Wedge-Shaped Sanding Sponge is the perfect sanding tool! This part of the job is done with a light in one hand, and the wedge-shaped sanding sponge in the other. 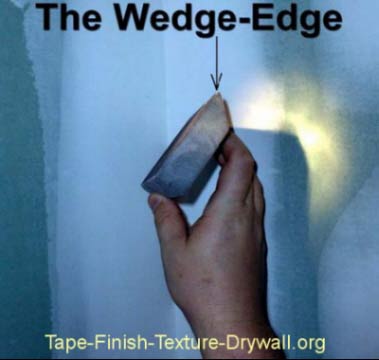 Sheetrock and Repair Tips #2: If youre using a brand new sponge, brush the edge areas of the sponge with sandpaper or another sanding sponge to help break the sponge in. This will help to minimize the problem described in the photos below.
 When sanding inside corners, theres no way to avoid moving the sponge in straight alignment. In this case, apply most of the pressure on the wedge-shaped edge, while holding the square-edge away from the wall just slightly. Otherwise, the square edge tends to cut lines into the wall. Use the sharp, wedge-shaped side of the sponge to neatly clean-out the area where the two walls meet. Take your time and be a perfectionist on this part. This is your chance to make the inside corners look great.
 Sheetrock and Repair Tips #3:Youll be using your trouble-light (or flashlight) from here on out, through the rest of the sanding process. Hold the light in one hand, and the sanding sponge in the other. 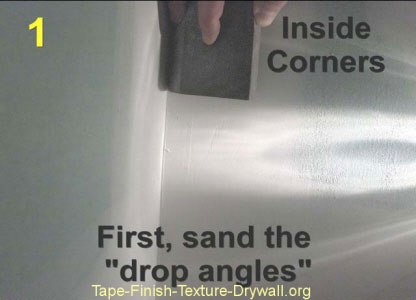
Small defects can usually be sanded out with the sanding sponge. Large defects like deep scratches and bubble holes are best handled by re-coating them (as opposed to grinding away at them with sandpaper.) Mark these areas with a pencil so that you know which spots to re-coat. Again, this is FAR easier than grinding away the large defects with sandpaper.
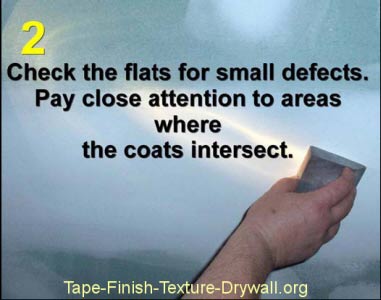
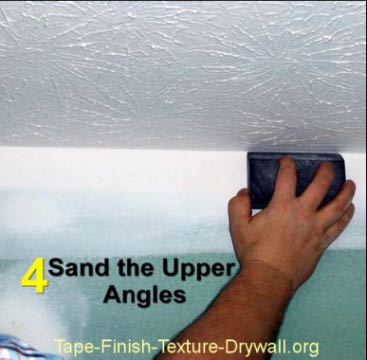
Use your light to check all of the areas where the joints intersect. Check all joints and corner bead one wall at a time. Check the wall-side of all upper angles with the light. Look for depressions from screws, lap marks from coating, or any other defects. 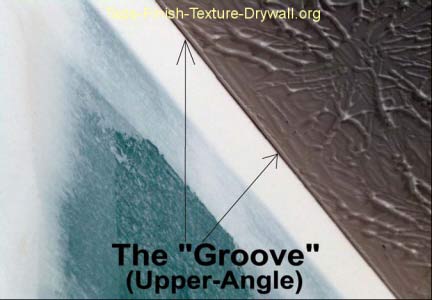 A small lip can form at the groove which actually makes the painting easier! Sheetrock and Repair Tips #4: For multiple touch-ups, try placing a few drops of food coloring into a partial pan of joint compound. Mix it in and use it for touch-ups. The food coloring makes the patches easier to recognize when youre sanding these areas, and it wont bleed through the paint. Carefully remove any excess joint compound that has dried in the electrical boxes with a utility knife. DONT TRY TO KNOCK THE EXCESS MUD OUT BY HITTING IT. Youll only damage the surrounding wall and create more repairs. Vacuum the entire work area. Be sure to vacuum out the electrical boxes, and any ledges. This keeps debris out of your paint. |